 lumenfix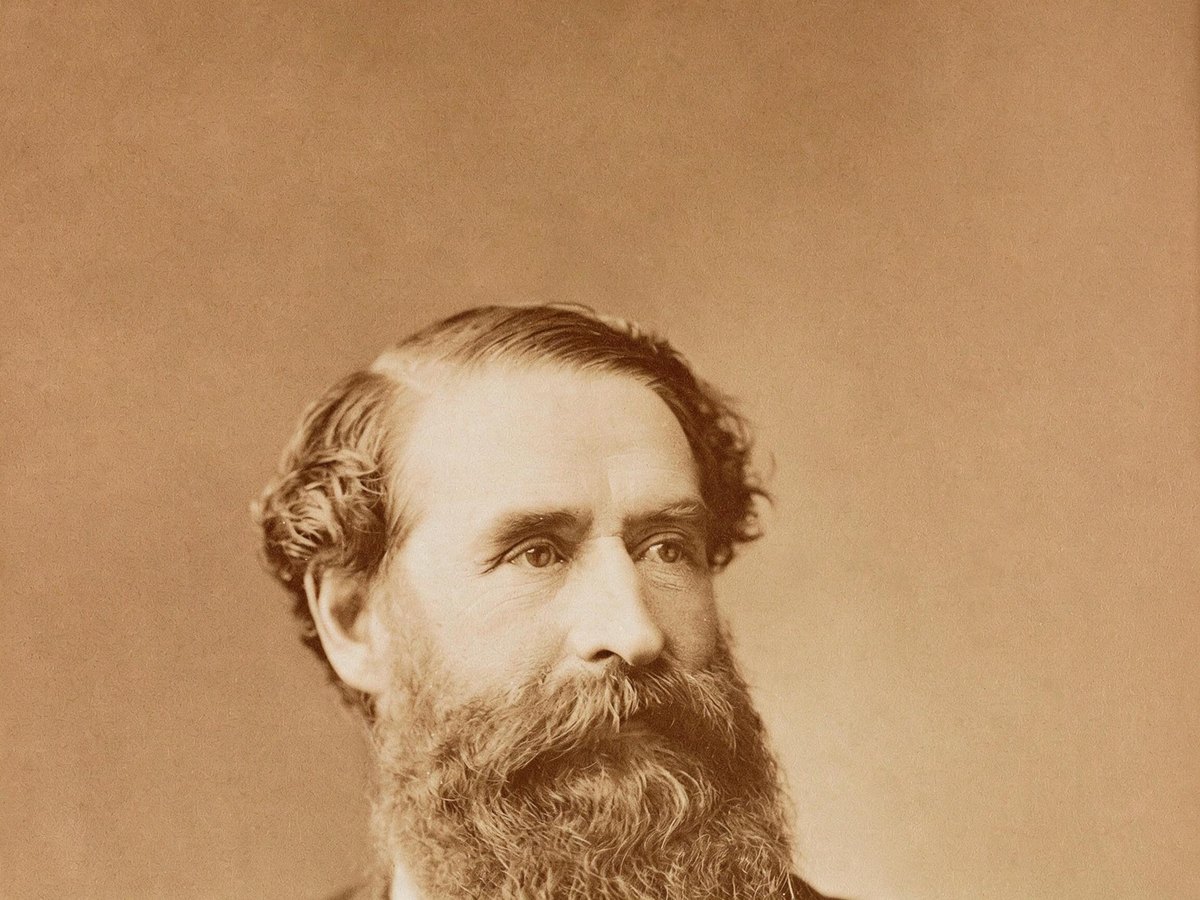
Real result
Scratches and dust on a portrait
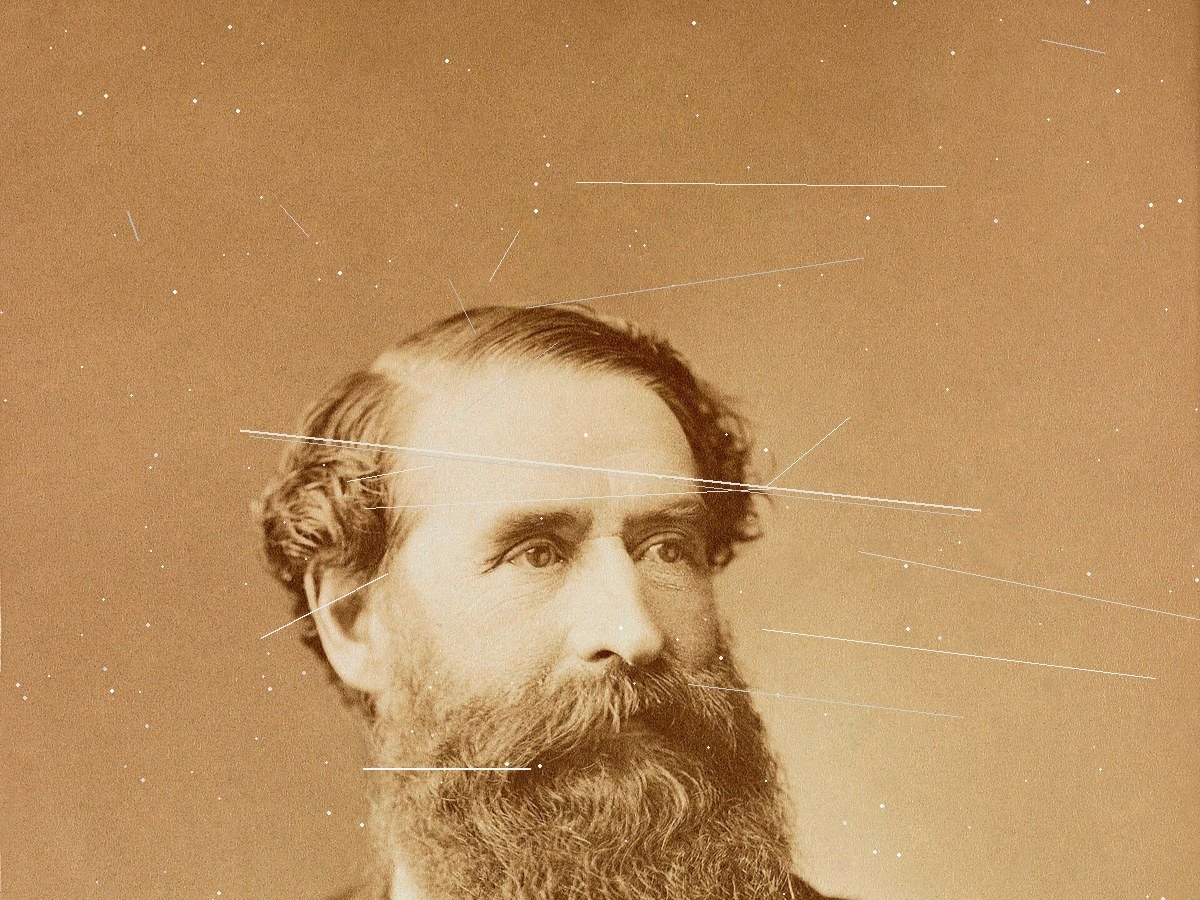
Thin scratches and dust added to a public-domain portrait, one line across the face. The Standard run took them off. The face stayed the same; skin came out slightly smoother.
Free · no account required
Repair scratches, dust, creases, torn corners, mold, and stains on a print you already have. Black-and-white and sepia stay that way.
Scratches, a crease and torn corner, stains, a glass plate, and a damaged family group. Every after side is a real Standard result. The first three start from a clean public-domain print with damage we added; the last two were already damaged. Drag the slider and read what changed.
Thin scratches and dust added to a public-domain portrait, one line across the face. The Standard run took them off. The face stayed the same; skin came out slightly smoother.
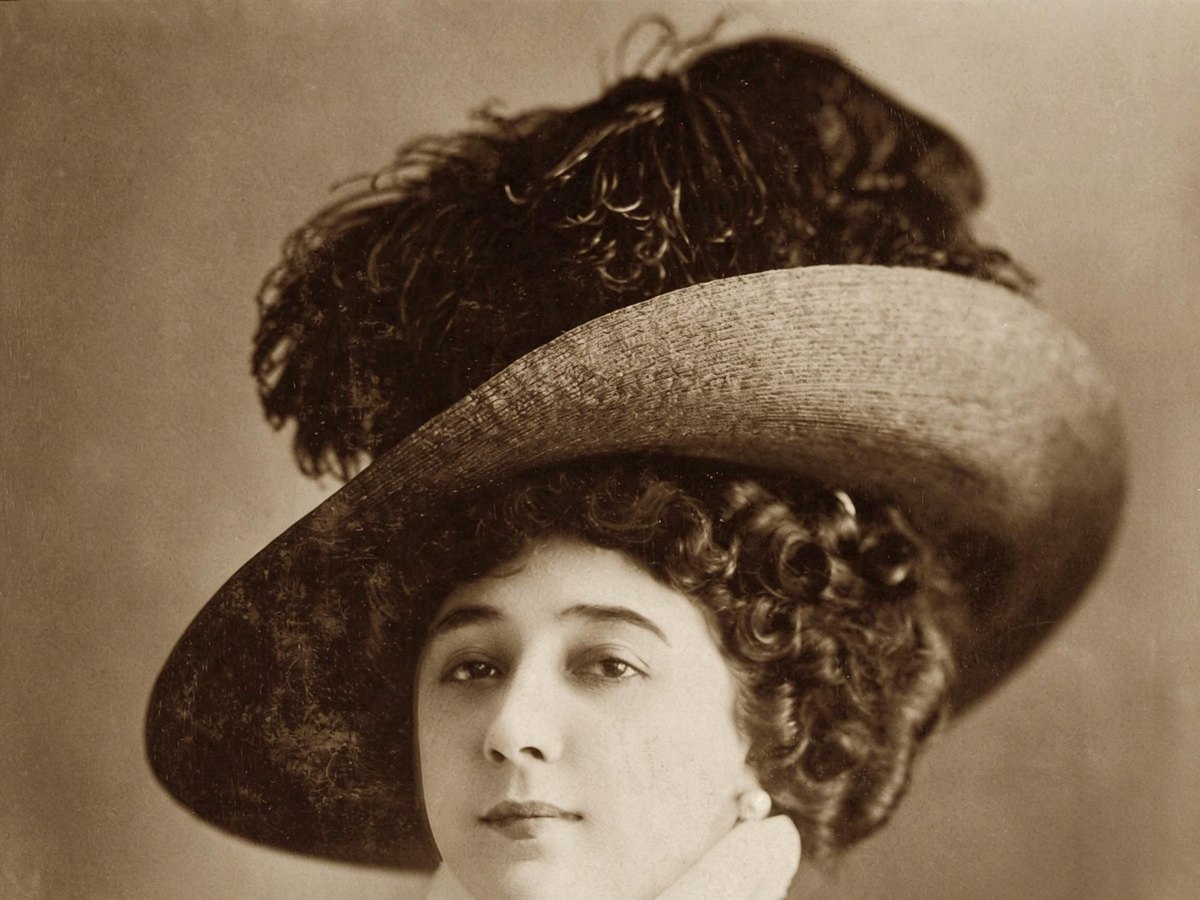
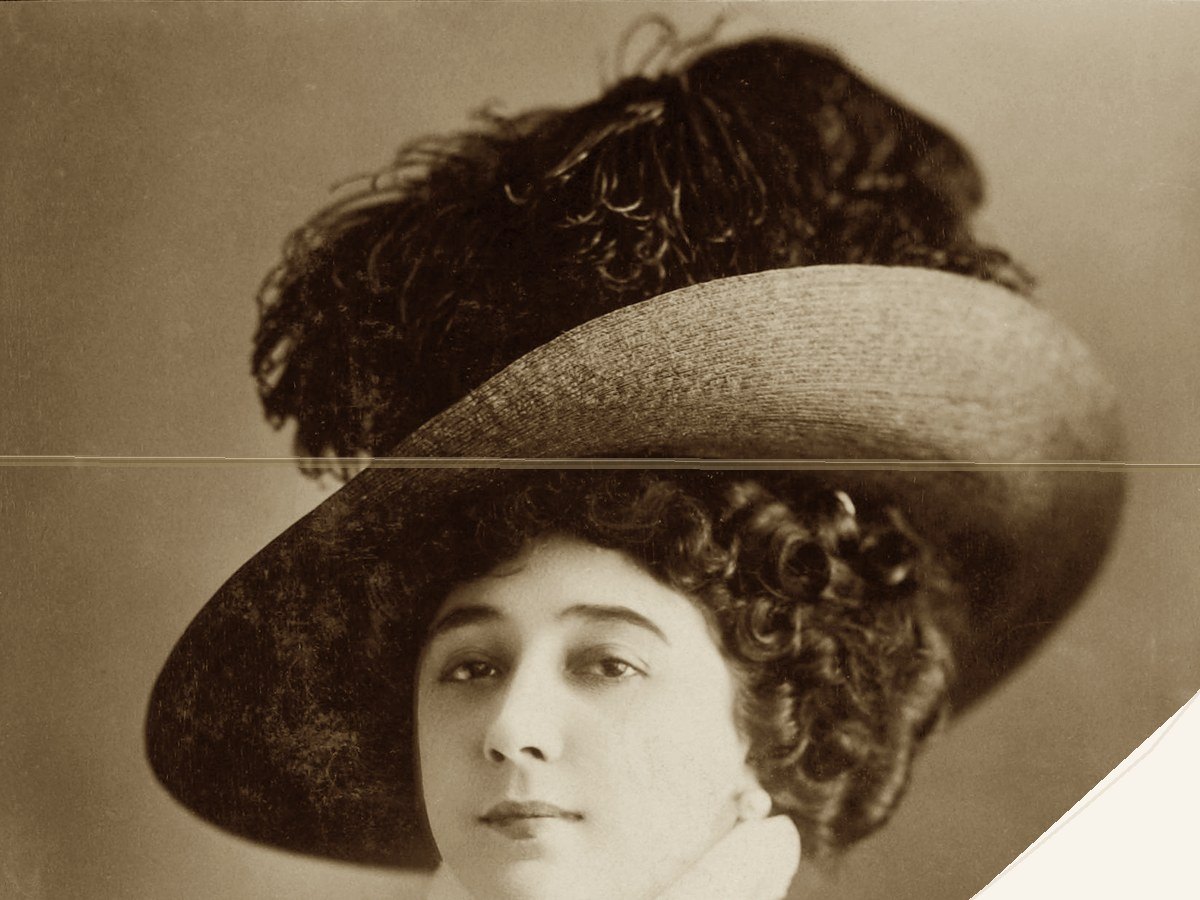
A crease across a sepia print and a corner cut to paper-white. The Standard run removed the crease and drew in the missing hat brim. That brim is a guess.
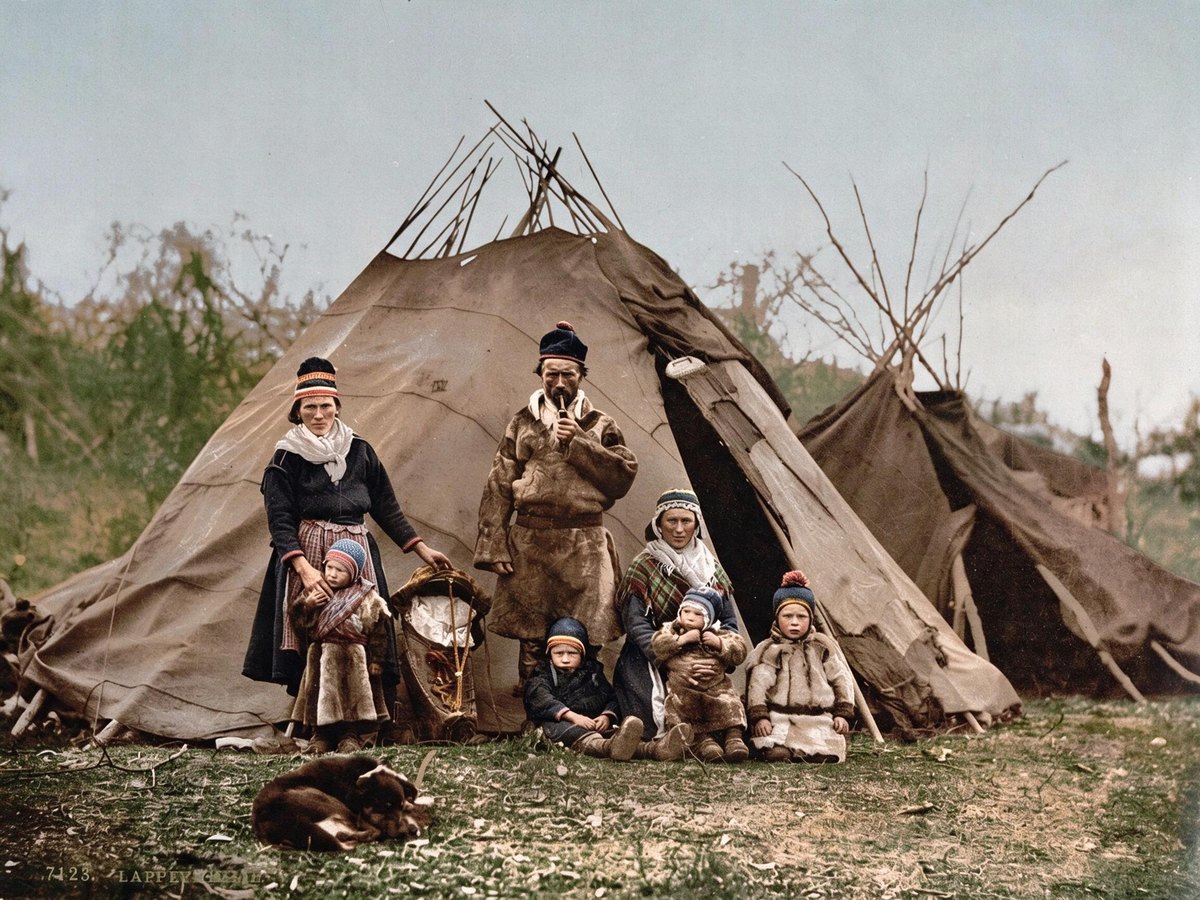
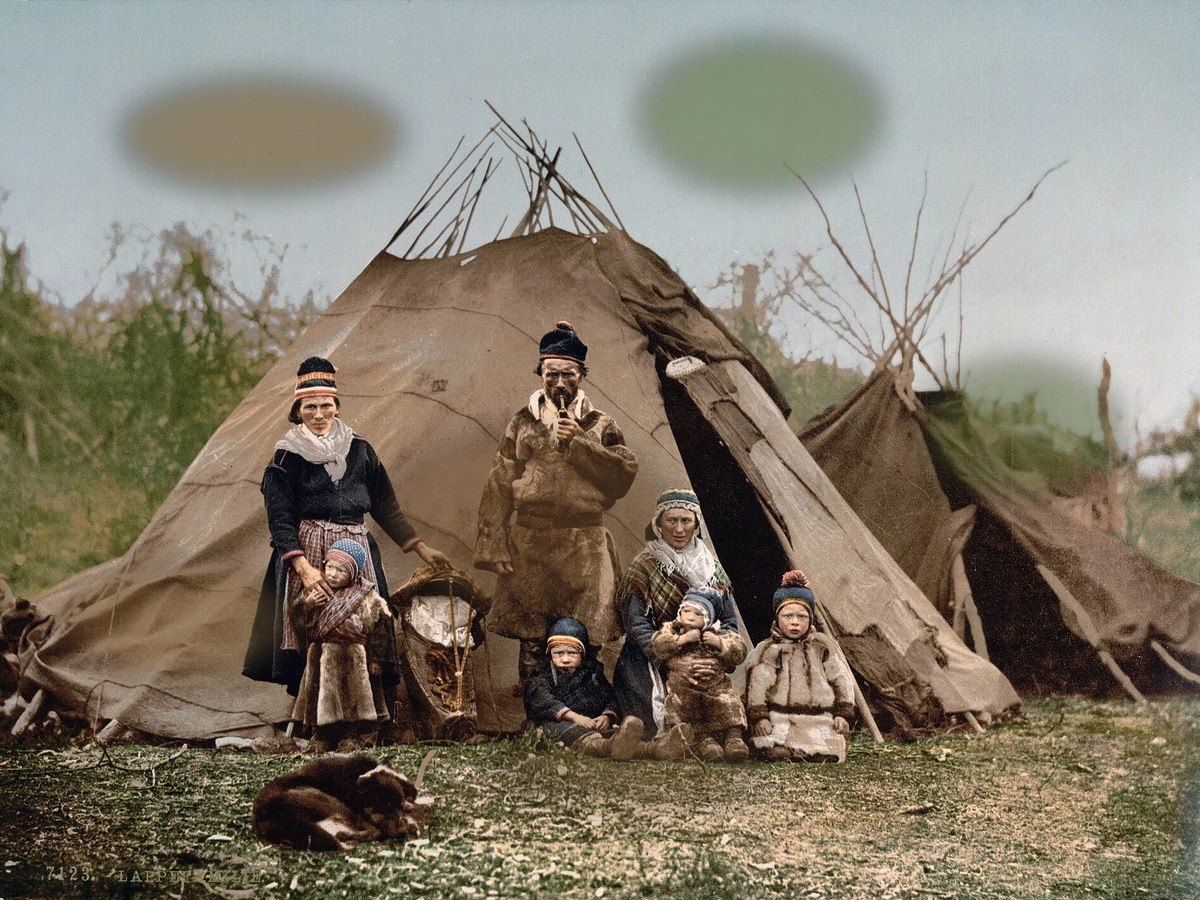
Mold-like stains added to a public-domain group scan. The Standard run took them off, and the small faces stayed close to the original. Check every face on your own run.
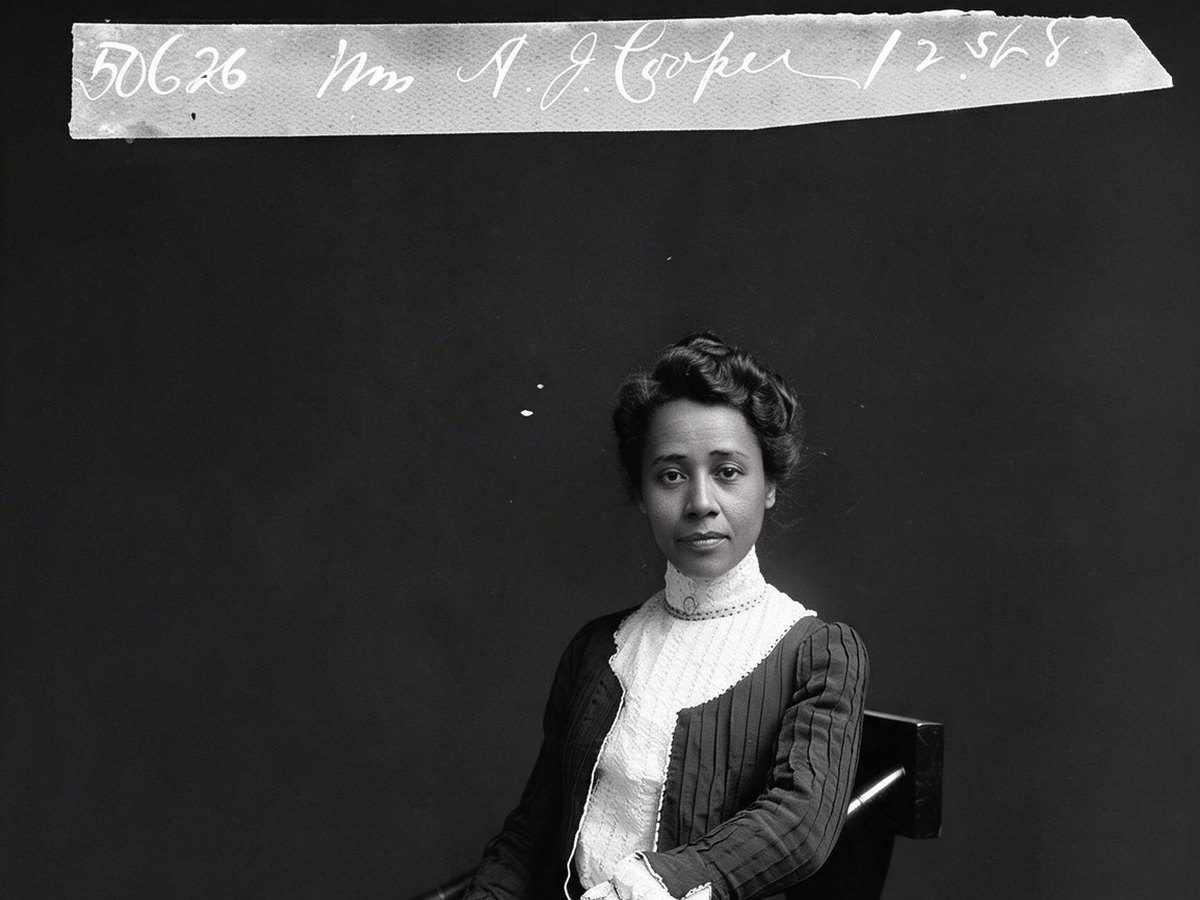
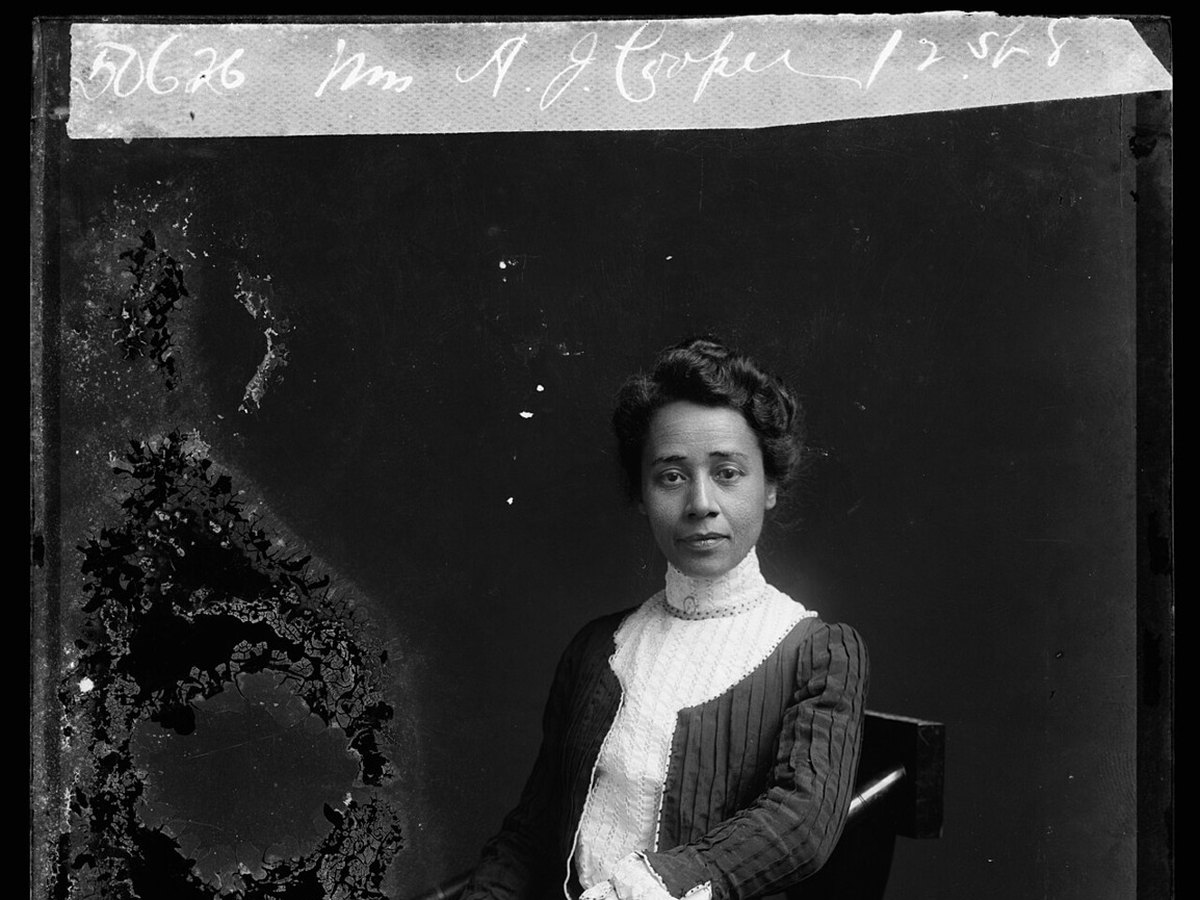
A real 1900s glass plate with flaking emulsion. The Standard run cleared the flaking. The face and the handwritten caption stayed the same, and the dark scan border was trimmed.
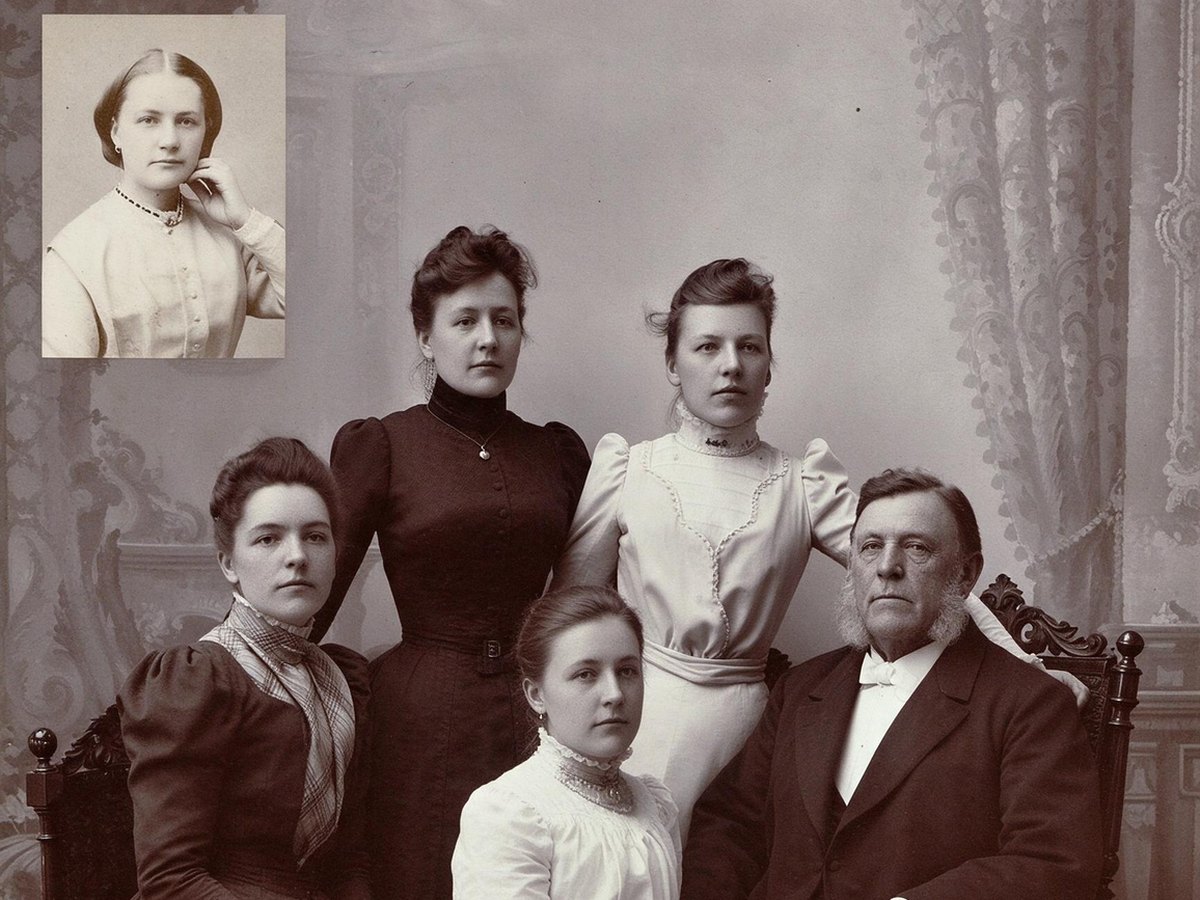
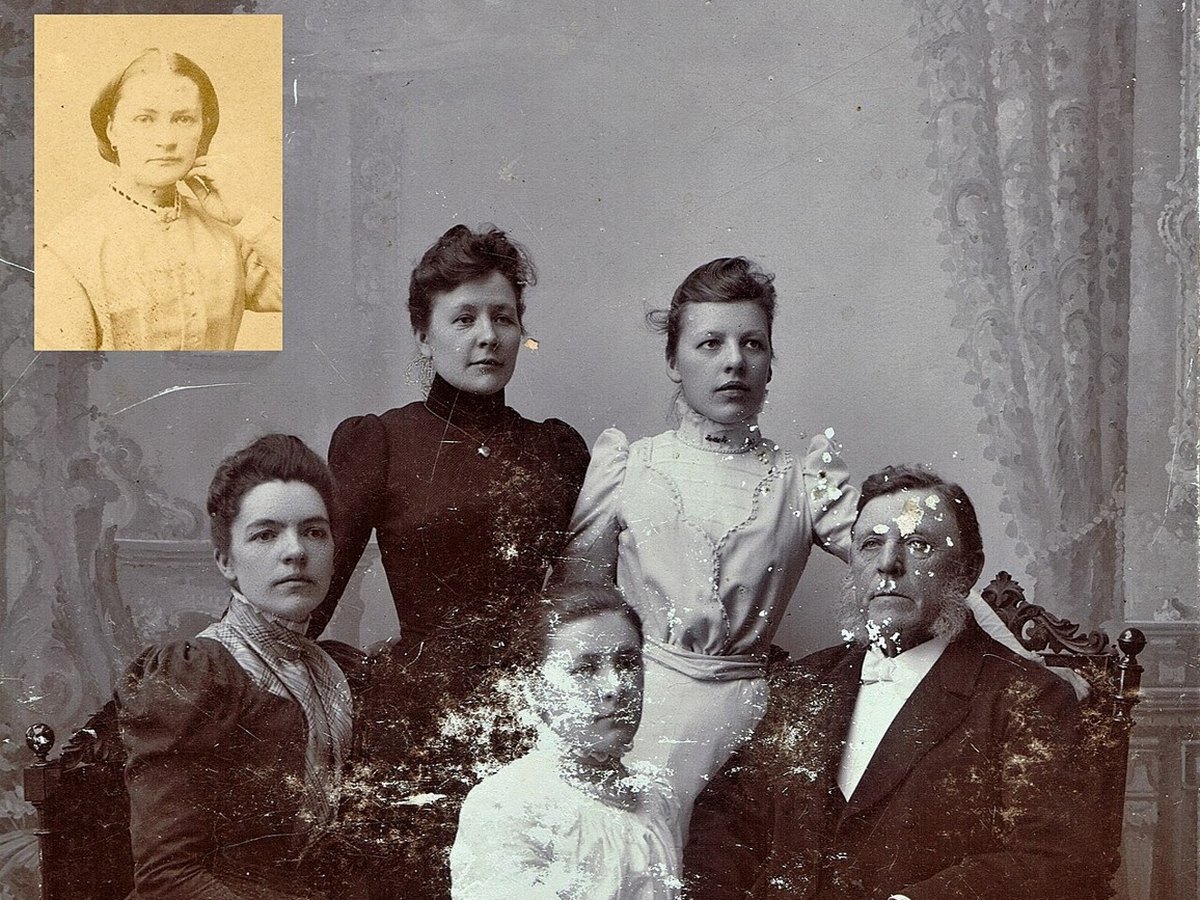
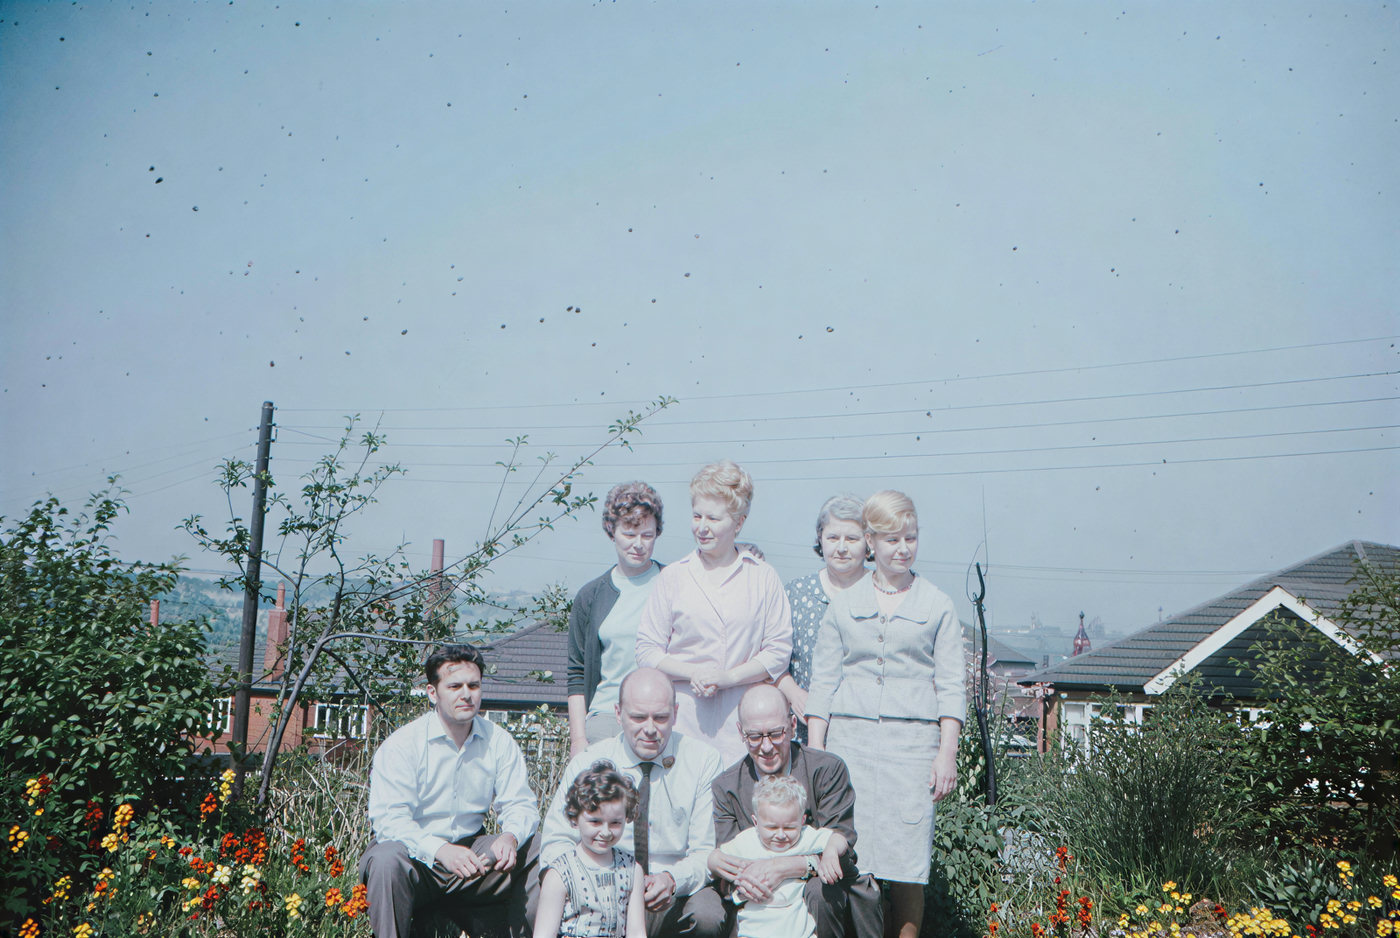
A real sepia family print. Emulsion loss covers the front girl's face and flecks the man on the right. His face stayed close to the original. Hers was almost gone, so her face in the result is redrawn, not recovered. The yellow inset print came out neutral.
Step 1
Lay the print flat, or photograph it straight on. Then upload a JPG, PNG, or WebP up to 15 MB.
Step 2
There is one option. No scene presets and no second model. The run uses your daily free credits when you still have them.
Step 3
Drag the before-and-after slider. Check the face and any handwriting, then download.
It takes scratches, dust, creases, tears, and stains off a print you already have. The edit is done by a general image editor.
Torn corners and missing patches are filled in from the rest of the print. That fill is inferred, not the original paper.
Black-and-white and sepia prints stay black-and-white or sepia. Color is a separate step on the Photo Colorizer.
This page is for physical damage. For a soft scan that is otherwise intact, use the AI Photo Enhancer.
Scratches and dust, creases and torn corners, mold and water stains, flaking glass plates, and scanned family albums. Each card below is a real Standard result and says what changed.
The run targets damage on the print. A face under heavy damage is redrawn, so compare the result.
01
Fine lines and specks across a portrait or a group scan are the main target.
02
A fold or a torn corner can be filled in. The fill is inferred from nearby paper, not recovered from the missing piece.
03
The prompt keeps black-and-white and sepia prints in that palette. Add color later on Photo Colorizer if you want it.
04
A free run exports a JPG up to 2048 px on the long side, with no watermark. A Pro subscription uses the same model at the same credit cost and can download the model's full output.
Every after side is a real Standard run, not a retouched original. The first three cards add damage to a clean public-domain print. The last two are prints that were already damaged. Each card says what changed.
Thin scratches and dust added to a public-domain portrait, one line across the face. The Standard run took them off. The face stayed the same; skin came out slightly smoother.
A crease across a sepia print and a corner cut to paper-white. The Standard run removed the crease and drew in the missing hat brim. That brim is a guess.
Mold-like stains added to a public-domain group scan. The Standard run took them off, and the small faces stayed close to the original. Check every face on your own run.
A real 1900s glass plate with flaking emulsion. The Standard run cleared the flaking. The face and the handwritten caption stayed the same, and the dark scan border was trimmed.
A real sepia family print. Emulsion loss covers the front girl's face and flecks the man on the right. His face stayed close to the original. Hers was almost gone, so her face in the result is redrawn, not recovered. The yellow inset print came out neutral.
These are scanning tips. They are not a promise about what the editor will do.
Take the print out of the album if you can, and scan it flat. A curved page keeps a shadow in the fold.
Glass on a frame adds glare. Take the print out when you can. If you have to shoot through glass, the glare remover can help after the shot.
Hold the phone parallel to the print, turn the flash off, and light from the side so you do not add a new reflection.
Repair damage on this page, then add color on Photo Colorizer. Colorizing a scratched print paints the scratches too.
If you're happy with the result, it's ready to save. If you also want to upscale, extend the edges, or refine other details, you can continue with:
Enhance
5General AI image enhancement. Standard 2×, Pro for finer detail and color.
Free · Pro
Sharpen blurry text and screenshots cleanly.
Free · Pro
Take glare off glasses, camera flash, and sun.
Free · 4 credits
Repair scratches, creases, and tears on an old print.
Free · 4 credits
Add natural, lifelike color to black-and-white photos.
Free · Pro
Restyle
5Put the people in your photo into a Christmas scene.
Free · 4 credits
Turn a photo into an oil painting or watercolor.
Free · 4 credits
Turn a photo into a pencil drawing.
Free · 4 credits
Turn a photo into a page to print and color.
Free · 4 credits
Turn a photo into a cartoon.
Free · 4 credits
Upscale & extend
2Free convert
10Convert WebP images to lossless PNG.
Free
Convert JFIF files to standard JPG format.
Free
Convert AVIF images to standard JPG format.
Free
Optimize PNG images into lightweight WebP.
Free
Convert JPG photos to lightweight WebP.
Free
Convert JPEG stills to WebP for the web.
Free
Convert WebP images to standard JPG.
Free
Convert WebP images to JPEG files.
Free
Convert PNG stills to smaller JPG photos.
Free
Convert JPG photos to PNG for editing.
Free